the Garmin 196
Presentation
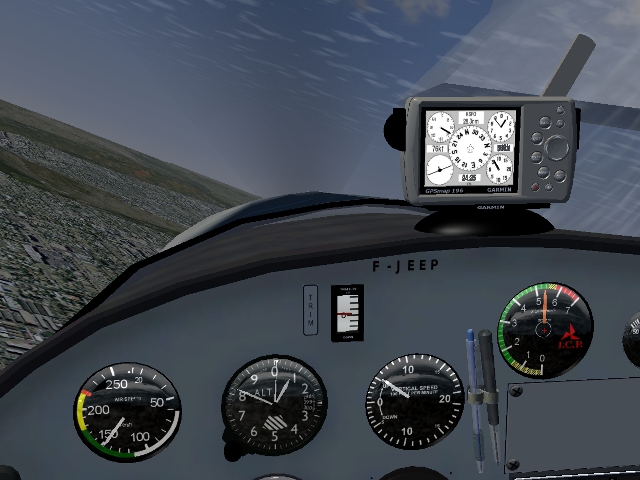
The Garmin 196 is a GPS receiver to do navigation. It includes land, naval and aerial modes. In the simulated feature, there is only the aerial mode.
Installation
To install the Garmin 196, you must declare the nasal in the definition file of the aircraft.
<nasal>
	<garmin196>
		<file>Aircraft/Instruments-3d/garmin196/garmin196.nas</file>
	</garmin196>
</nasal>
Then declare the xml describing the instrument. Caution, there are two (for now). The first model with the support of Clement OF HAMAIDE (aka F-JJTH)
<!-- Garmin196 -->
<model>
	<path>Aircraft/Instruments-3d/garmin196/garmin196_support1.xml</path>
	<offsets>
		<x-m>  0.235 </x-m>
		<y-m>  0.000 </y-m>
		<z-m>  0.253 </z-m>
	</offsets>
</model>
The coordinates correspond to a facility in the Tecnam 92 ... To install only the Garmin, use the file garmin196.xml (for integration into a panel for example ...). The path (Aircraft/Instruments-3d/garmin196 /) implies that we have installed the directory containing the instrument in Aircraft/Instruments-3d /.
Using
Description
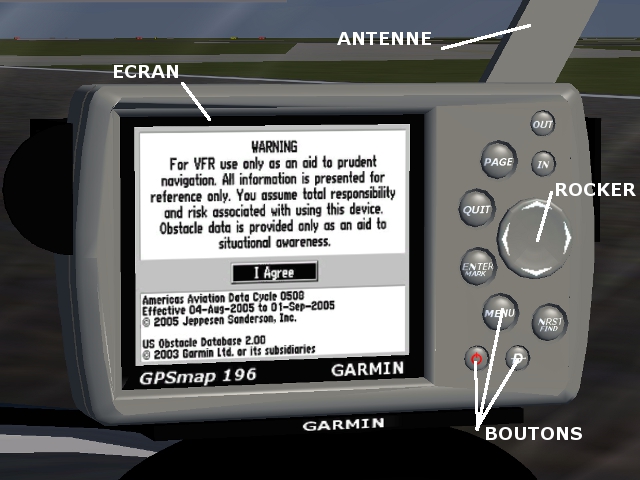
We have the following elements:
- A screen where it will display the various screens.
- Buttons (IN, OUT, PAGE, QUIT, ENTER,MENU,NRST,D (the D with a line in the middle, DIRECT TO) and Power (The red button)
- A ROCKER (the button with the four arrows UP, DOWN, LEFT and RIGHT
- An antenna located behind. To rotate the antenna, LMB to rotate in the counterclockwise and clockwise for CMB.
Starting
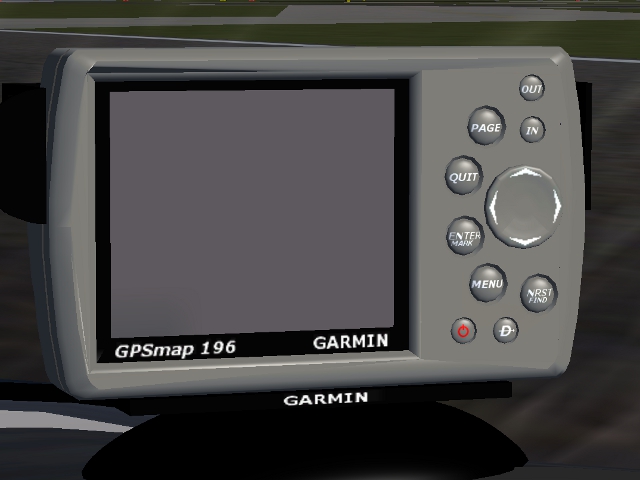
At start of FlightGear, the Garmin is off.
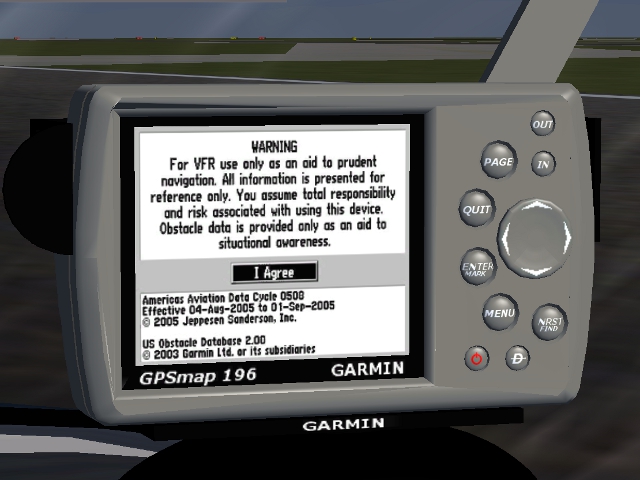
To switch on, click the Power button (LMB). The Garmin will display the home page.
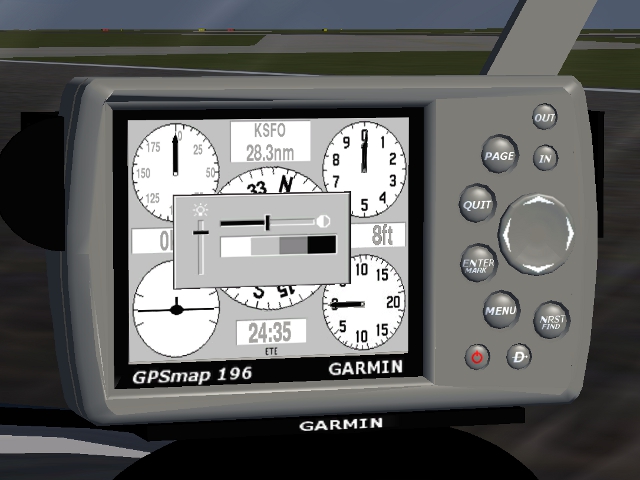
Click Enter to validate the startup (LMB). You are now on the Map Page ... At any time, by clicking Power (CMB) will display the popup of brightness adjustment.
Click on the rocker up or down (LMB) to fit. This brightness is stored when the extinction Gamin (LMB on Power)
Map Page
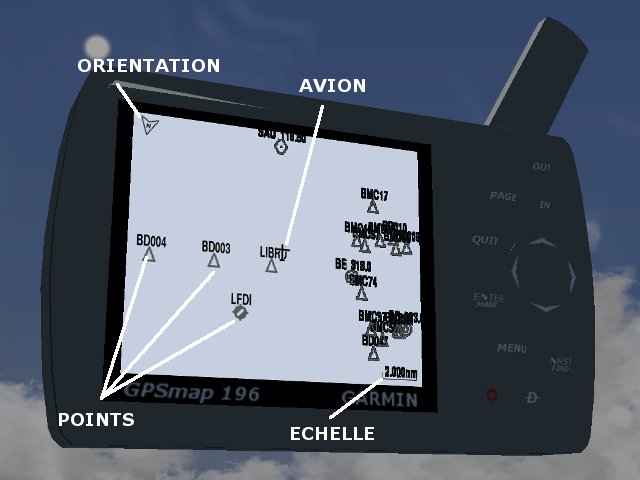
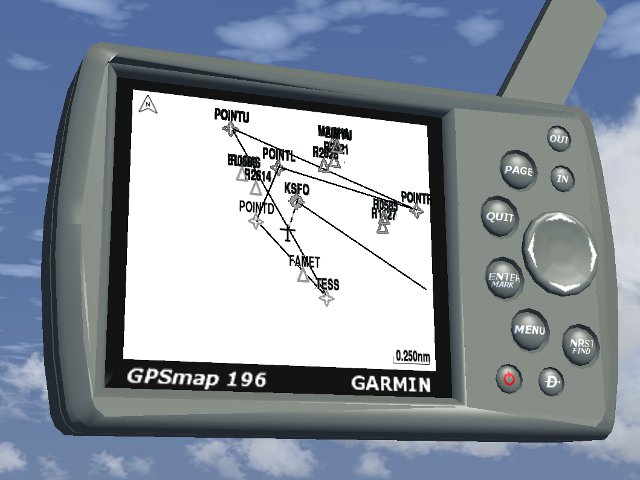
This screen allows you to view the FlightGear fixed points, namely:
- The airports
- The VOR stations
- The NDB stations
- The FIX points (approachs, airways ...
- Bonus! cities of over 20,000 inhabitants. Yeah, we had to make a choice between the loading time, size of the xml file and readability of the screen ...
It was also an indication of the north at the top left and bottom right scale. This scale can be changed with the IN and OUT buttons.
Panel Page
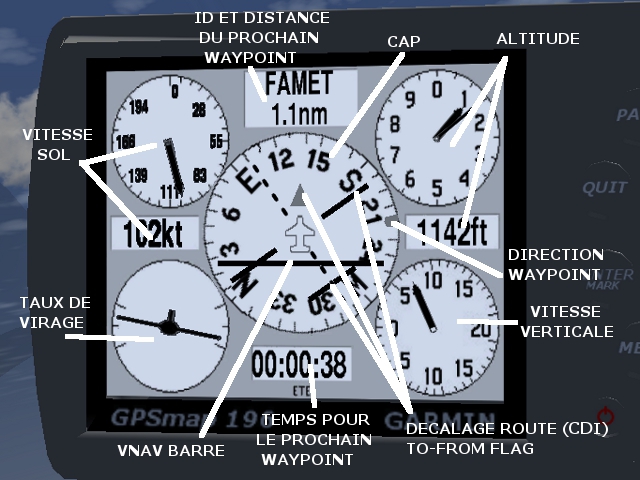
On this screen, we have the following informations :
- Ground speed: beware, this is not the airspeed. With a headwind, you'll feel like going more slowly than the air speed, you risk an overspeed and vice versa in case of wind back, you will go faster than the speed of air and therefore may stall.
- Altitude: The altitude is real, relative to sea level Warning, it does not depend on the atmospheric pressure. It is even less the height from the ground.
- The heading calculated with the displacement : it needs a displacement and therefore speed to calculated this heading
- The CDI : Course Deviation Indicator. When you enter a flight plan, the Garmin display the CDI. It indicate the route between the actual waypoint and the next. You can also see the decalage between your position and this route. When you are in DIRECT TO mode or on the last waypoint, the CDI is aligned with the waypoint bug. You can also see a TO or FROM indicator.
- The VNAV bar : this bar helps you in approach. (Be carreful, the Garmin is not intend to do IFR approach). When a GPS point (an airport only) is selected, the Garmin calculs the ideal glide ratio to target (3 degres) and displays if you are below or above.
- The heading to go to the next waypoint
- Turn rate: the number of degrees per second (5 degrees when the wings are along a small bar). This is not the inclination of the plane.
- The vertical speed
- The identification, distance and time to arrive at the current ground speed. Appears only when a GPS fix has been entered (with a flight plan (Active road) or point (Direct-to)
We move from one screen to another by clicking (LMB) on PAGE or QUIT.
Position Page
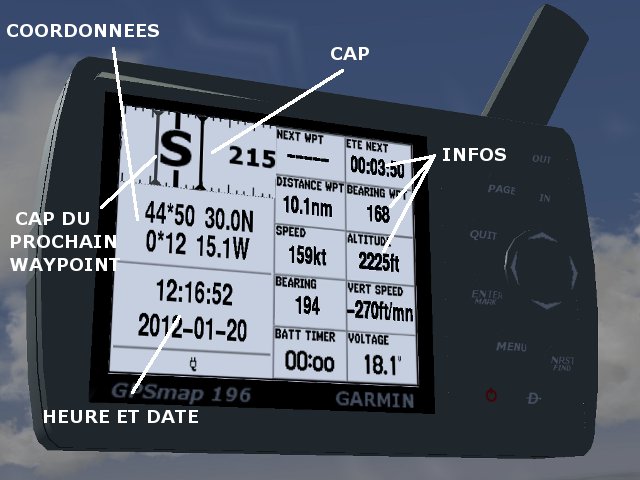
On this screen, we have the following informations:
- A compass display a scrolling banner
- The coordinates of the aircraft position (latitude and longitude)
- The time and date
- Various information (not parameterizable for now)
- The id of the next waypoint
- The time to reach the next waypoint
- The distance of the next waypoint
- The course of the next waypoint (in number and on the compass banner (the grey bar)
- The ground speed
- The altitude
- The heading
- The vertical speed
- Two false informations : batt timer and voltage
- The identification, distance and time to arrive at the current ground speed. Appears only when a GPS fix has been entered (with a flight plan (Active road) or point (Direct-to)
On Panel Page, Position Page and Map Page, you can enter your current location by clicking ENTER with the middle button of the mouse (CMB).
Direct To
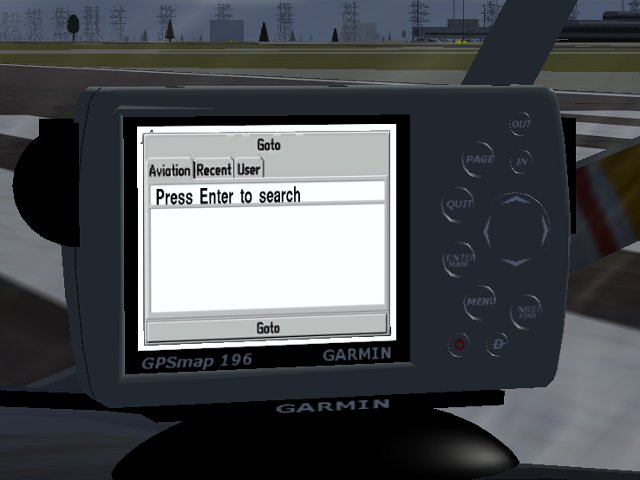
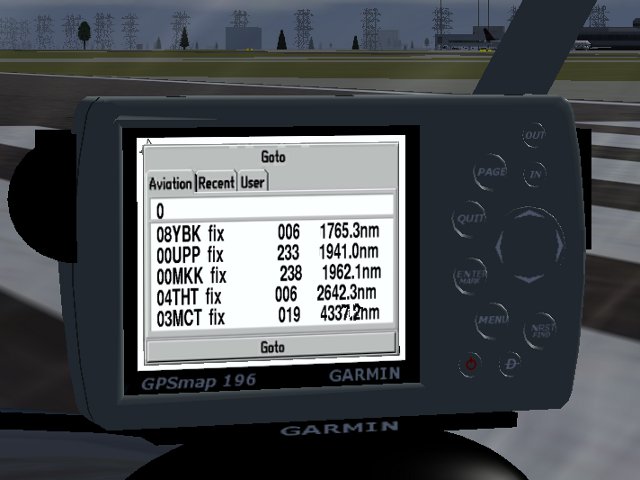
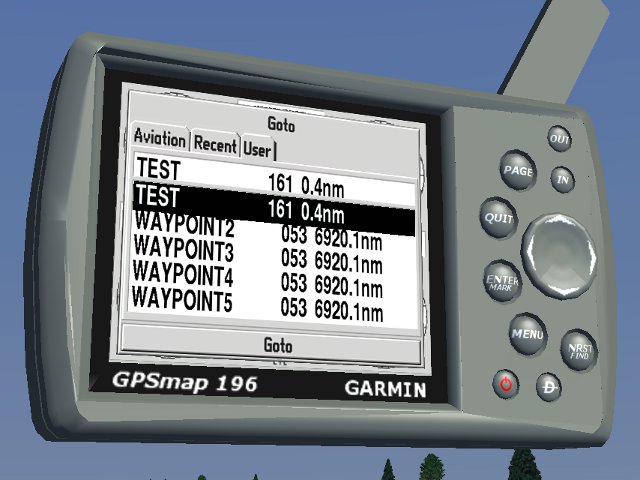
By clicking on the button DIRECT TO, you have a popup appear. To navigate between tabs 3, use the ROCKER LEFT and RIGHT
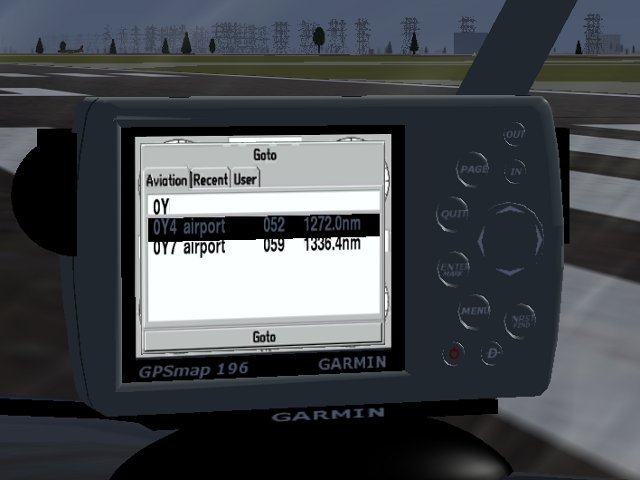
Aviation tab
This tab allows you to find a waypoint (airport, VOR, NDB, and fix wpt).
As noted, click ENTER.
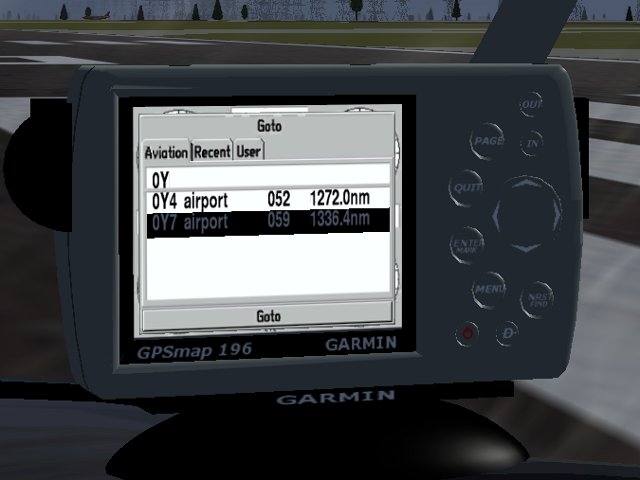
To change the current letter (the rightmost in the text box above), use the UP and DOWN ROCKER with the left mouse button (LMB) to move forward or backward one letter of a letter, and the button Central (BMC) to go from 10 to 10, use the ROCKER LEFT and RIGHT. The window display located below the top 5 results starting with those letters. Then, click ENTER to go to the list below.P
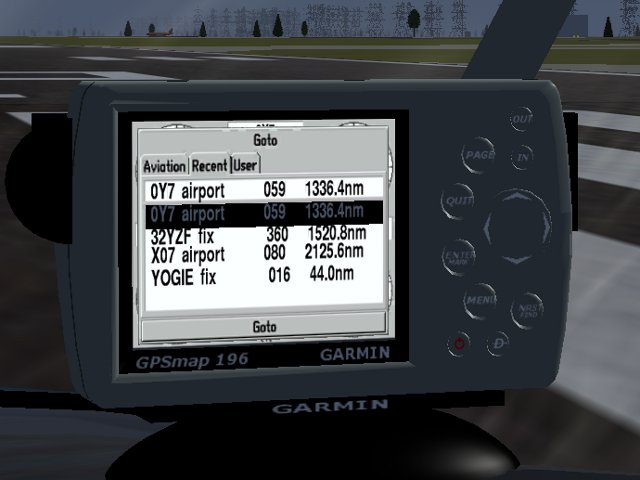
The first line is focused. Use the ROCKER UP and DOWN to select the line you want and click ENTER. The Garmin then selects the selected line and stores it in the recent waypoints.
Recent tab
This tab displays the last 5 waypoints selected in the Aviation tab. To navigate, use the UP and DOWN ROCKER and click ENTER to select the line.
User tab
This tab shows the top 5 saved waypoints. To navigate, use the UP and DOWN ROCKER and click ENTER to select the line.
NRST (Nearest point)
By clicking the NRST, a popup appears. To navigate between 5 tabs, use the ROCKER LEFT and RIGHT
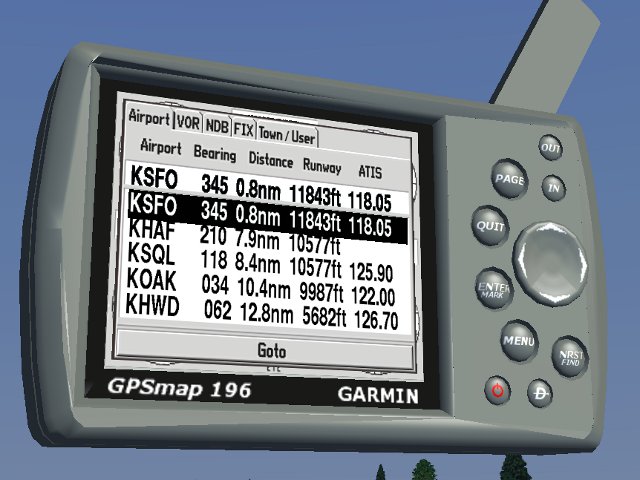
The five tabs are :
- Airport : displays the five closest airports, with information such as :
- the identifier
- the heading to go to this waypoint
- the distance
- the length of the biggest runway
- the frequency of the ATIS or AWOS ACOS, if there is an airport in this (In the picture, for example, has no Khaf ATIS)
- VOR : Displays 5 nearest VORs, with information such as :
- the identifier
- the heading to go to this waypoint
- the distance
- the frequency of the VOR
- NDB : Displays 5 nearest NDBs, with information such as :
- the identifier
- the heading to go to this waypoint
- the distance
- the frequency of the NDB
- FIX : Displays 5 nearest FIXs, with information such as :
- the identifier
- the heading to go to this waypoint
- the distance
- Town / User : Displays 5 nearest towns and/or user waypoints, with such information (cities and user waypoints are mixed because of the waypoint management FlightGear ...):
- the identifier (actually his name)
- the heading to go to this waypoint
- the distance
By clicking the UP and DOWN ROCKER, scroll through the list you found. Click ENTER to accept the waypoint. If the waypoint is not yet in recent waypoint (in DTO, Recent), the Garmin will store the waypoint.
MENU
By clicking on the MENU button, you pop up a menu window with 8 tabs:
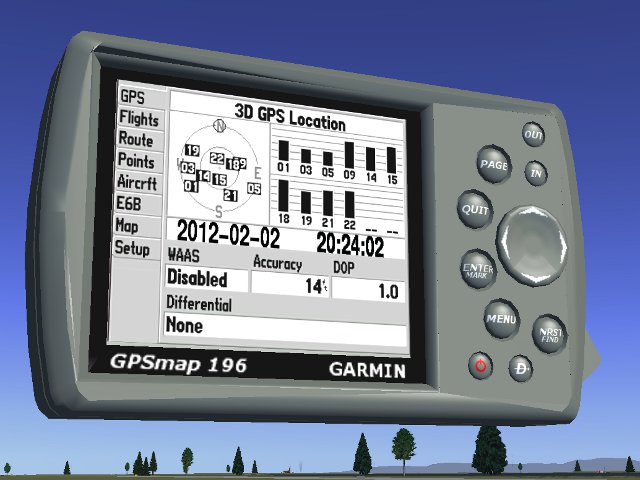
- GPS: a screen that is only for show ...
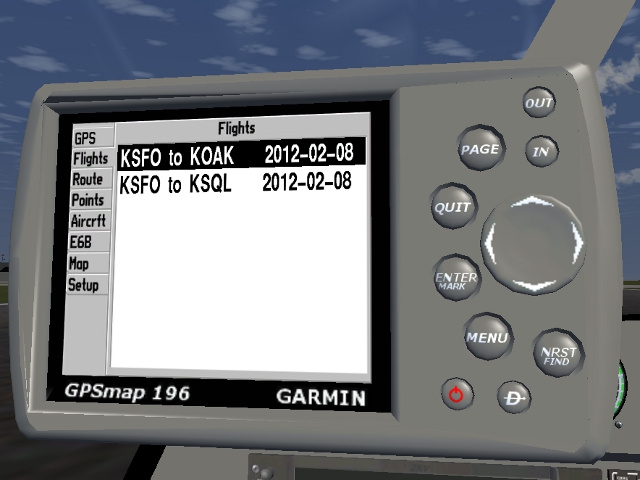
- Flights: List the last flights
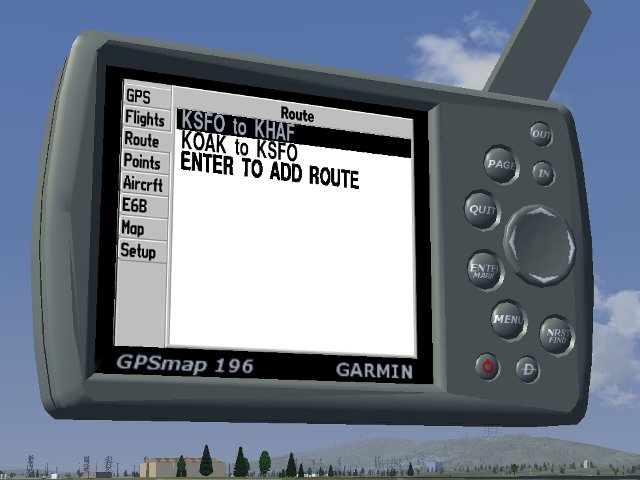
- Route: list of stored routes
- Points: user waypoint list
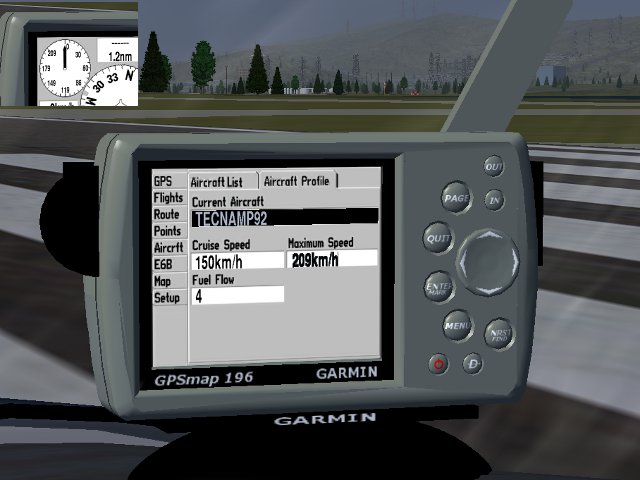
- Aircraft: Aircraft with their list of characteristics (vmax, among others)
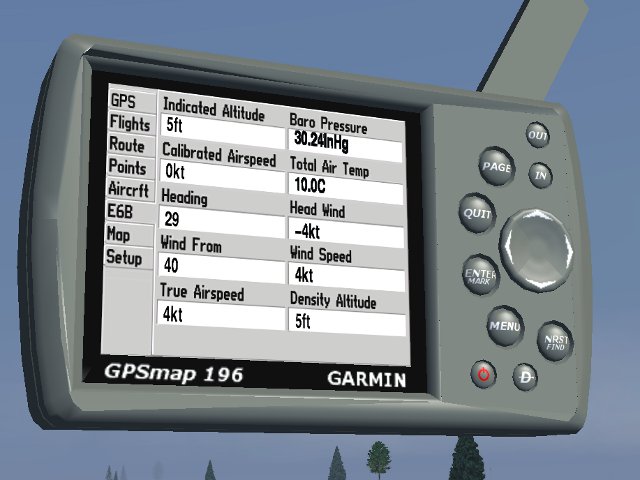
- E6B: a screen to do various calculations
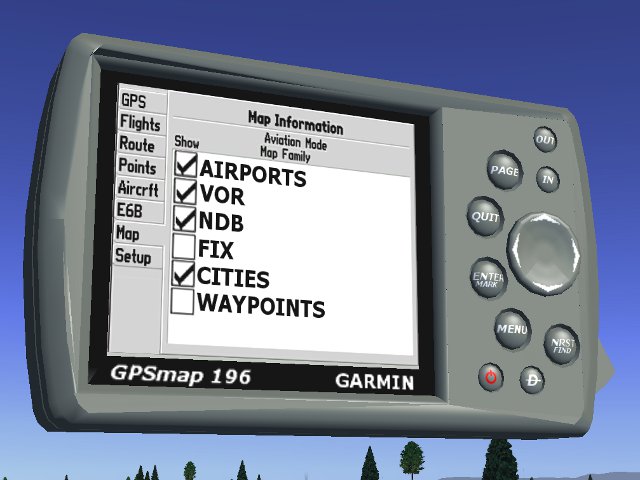
- Map: a screen of settings from the map panel.
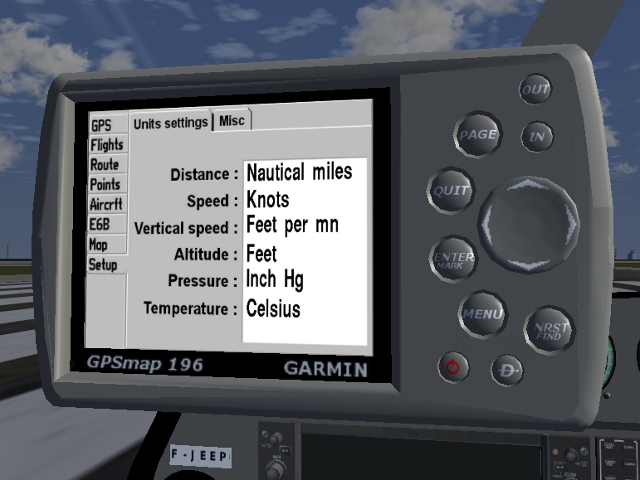
- Setup: screen (very simplified) to change the different units of measurement, and miscellanous things.
To navigate between tabs 8, use the UP and DOWN ROCKER, then press ENTER to confirm.
GPS Menu
Nothing to report or a change (thus the ENTER key is useless)
Menu Flights
This screen allows you to review the last 8 flights. Click ENTER (or ROCKER RIGHT) to select a line.
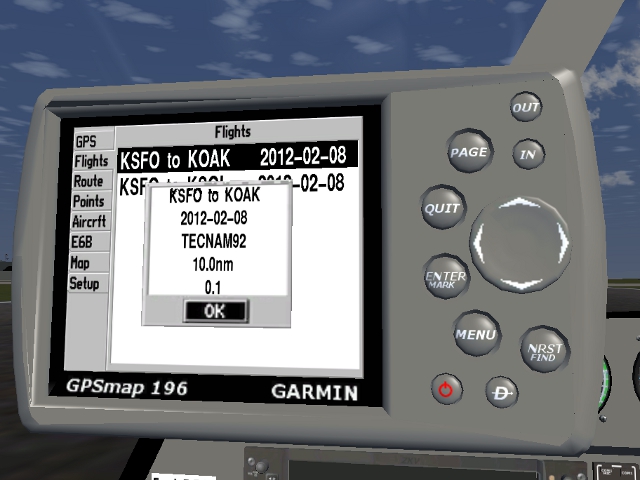
Then click ENTER to display a summary of the selected flight. QUIT or ENTER returns you to the previous screen.
Registering a flight begins of the speed exceeds 30 kt. The Garmin takes the airport, the date and the aircraft used (set in the aircraft menu). The flight stops in that the speed drops below 30kt. The garmin then complete the flight with an airport of arrival, distance and flight duration. These data will be saved.
Route Menu
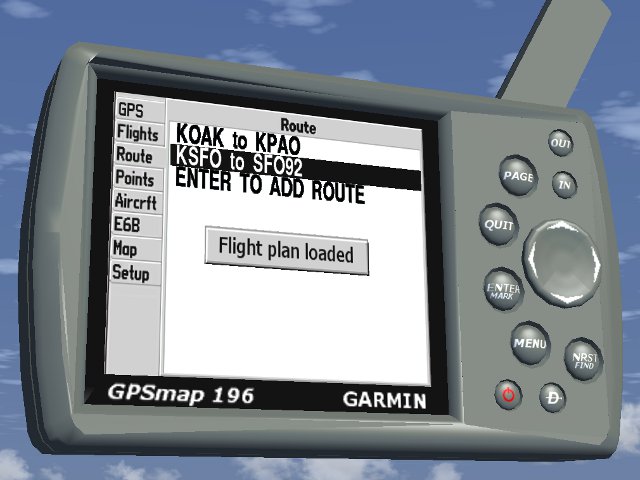
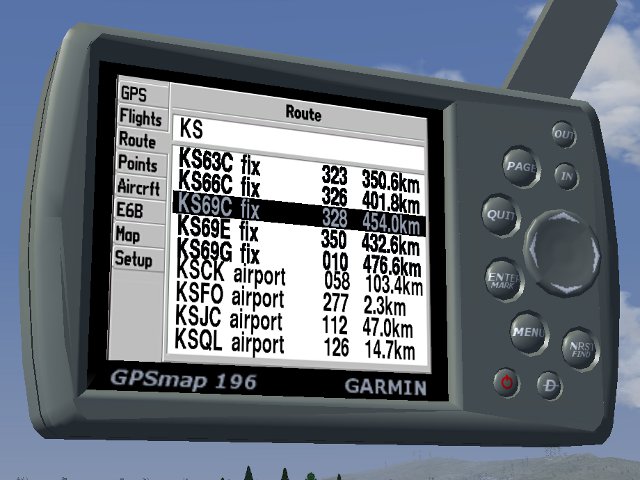
This screen allows you to manage 11 flight plans. Move on a flight plan already registered (ROCKER UP or DOWN) or "ENTER TO ADD ROUTE" and click ENTER to change the flight plan. The Garmin will tell you the road to go from point to point and automatically switch to the next point of you arrive near the current point. Using the ROCKER LEFT, you will delete the selected plan. Beware, there is no confirmation!
By clicking on the ROCKER RIGHT, you activate the flight plan selected.
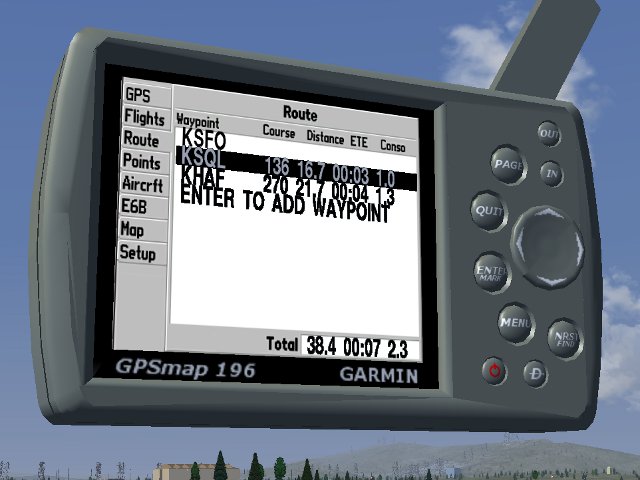
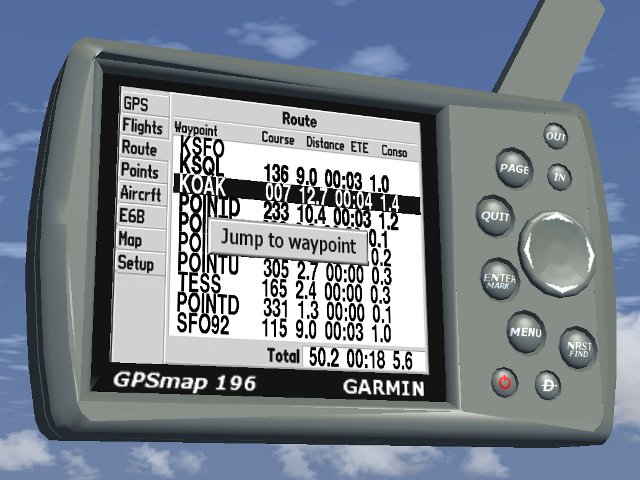
On this screen you can select the item to be changed with UP and DOWN ROCKER. clicking ENTER, you can change the current point or add one by selecting "ENTER TO ADD WAYPOINT". Clicking ROCKER LEFT, you delete the selected point. Beware, there is no confirmation!
By clicking on the ROCKER RIGHT, you activate the flight plan selected and switch directly to the selected waypoint. This is the one who will guide you. Obviously, you can do the same in flight, to skip one or more waypoint for example.
With this screen, you can look for the point you want to add or change. This screen works the same way as the search screen Direct To, Aviation tab.
And icing on the cake, the flight plan is displayed on the map!
Points Menu
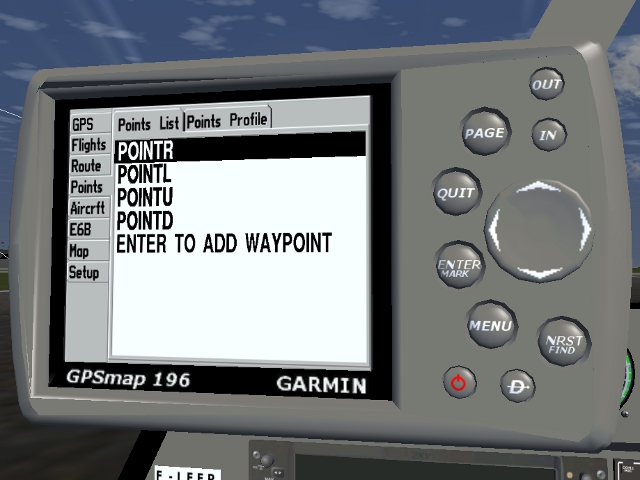
This screen allows you to enter 9 waypoints. Click ENTER to select a waypoint. Select your waypoint with UP and DOWN ROCKER and ENTER to display the second tab. You can add a waypoint by placing the "cursor" "ENTER TO ADD WAYPOINT" and click ENTER. You can also delete a waypoint by clicking LEFT ROCKER. Beware, there is no confirmation! Caution bis, the waypoint will be deleted on next system startup of FlightGear (there is no function to do that ...)
On this tab, ROCKER UP, DOWN, LEFT and RIGHT to change the name, ROCKER UP and DOWN to change the values of latitude and longitude, ENTER to move to the next and previous QUIT to go. After having entered the last field (decimal longitude), click ENTER to save what you just did.
Aircraft Menu
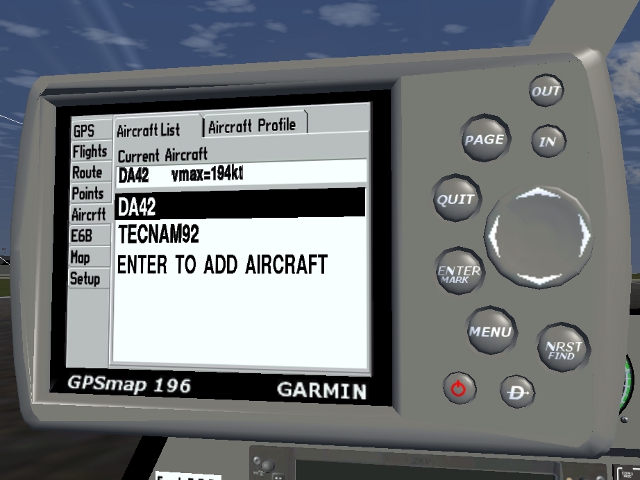
This screen allows you to enter the cruise speed, max speed and fuel consumption of 6 aircraft. Click ENTER to select a plane. Select your airplane with the UP and DOWN ROCKER and ENTER to display the second tab. You can add a plane by placing the "cursor" "ENTER TO ADD AIRCRAFT" and click ENTER. You can also delete an airplane by clicking LEFT ROCKER. Beware, there is no confirmation!
On this tab, ROCKER UP, DOWN, LEFT and RIGHT to change the name, ROCKER UP and DOWN to change the values of speed and consumption, ENTER to move to the next and previous QUIT to go. After you log consumption schedule, click ENTER to save what you just did.
E6B Menu
This screen presents data calculated by the Garmin. In real life, some are user entered (temperature, true air speed, etc.) and the Garmin calculates the other. For sake of ease, I decided to calculate all the data. Thus, it was not a bother to enter data ... Obviously, some measures (eg wind) can normally be calculated as if the Garmin is moving. We say that it's easy ;-).
Map Menu
This screen allows you to manage the displays icons of the map panel. Click ENTER then navigate using the UP and DOWN ROCKER. Check or uncheck by pressing ENTER. Click QUIT to exit.
Setup Menu
This screen allows you to manage the units of measurement for different screens. Click ENTER then navigate using the UP and DOWN ROCKER. Change the value in line with the ENTER key. Click QUIT to exit.
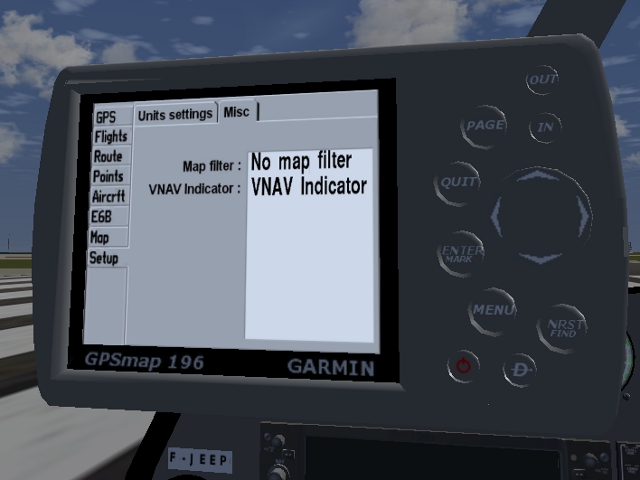
By clicking on the ROCKER RIGHT, you display this screen which allows you to manage a basic filter for the map page. With the filter activated, the Garmin will erase the airports, vor, etc ... in the center of the map if they are too airports, vor, etc ... in the center of the map if they are too. With VNAV Indicator, you select if you want to display the VNAV indicator bar or not .
Definitions
LMB : Left mouse button.
CMB : Center mouse button.
